

Build an app with Kai
Describe the app you want in plain language and let Kai build, preview, and deploy it — or create and configure the app manually on the same Create App screen.
Kai builds a working app from a plain-language description — no coding and no Git account needed. From one chat it reads your data, writes the code, and opens a live draft you can preview, refine, and publish. This is the fastest way to go from idea to a running app.
This page is the full guide to building in the platform — the Kai loop, how to prompt and refine, how Kai touches your data, and the manual creation path that lives on the same Create App screen. If you’d rather just follow one build end to end with screenshots, start with the quick Getting started walkthrough and come back here for the detail.
Before you start
Section titled “Before you start”- A Keboola project with the data you want to use — Kai reads it directly, so whatever is already in Storage works.
- Kai available in your project.
How building with Kai works
Section titled “How building with Kai works”From a single prompt, Kai runs the whole loop — explore, build, preview, publish:
- Start a build. Go to Apps → Create App, which leads with a “Describe what you want to build…” prompt — or open the Kai Agent chat anywhere in your project.
- Describe what you want in plain language — name the source tables, what the app should show, and the main thing people should be able to do.
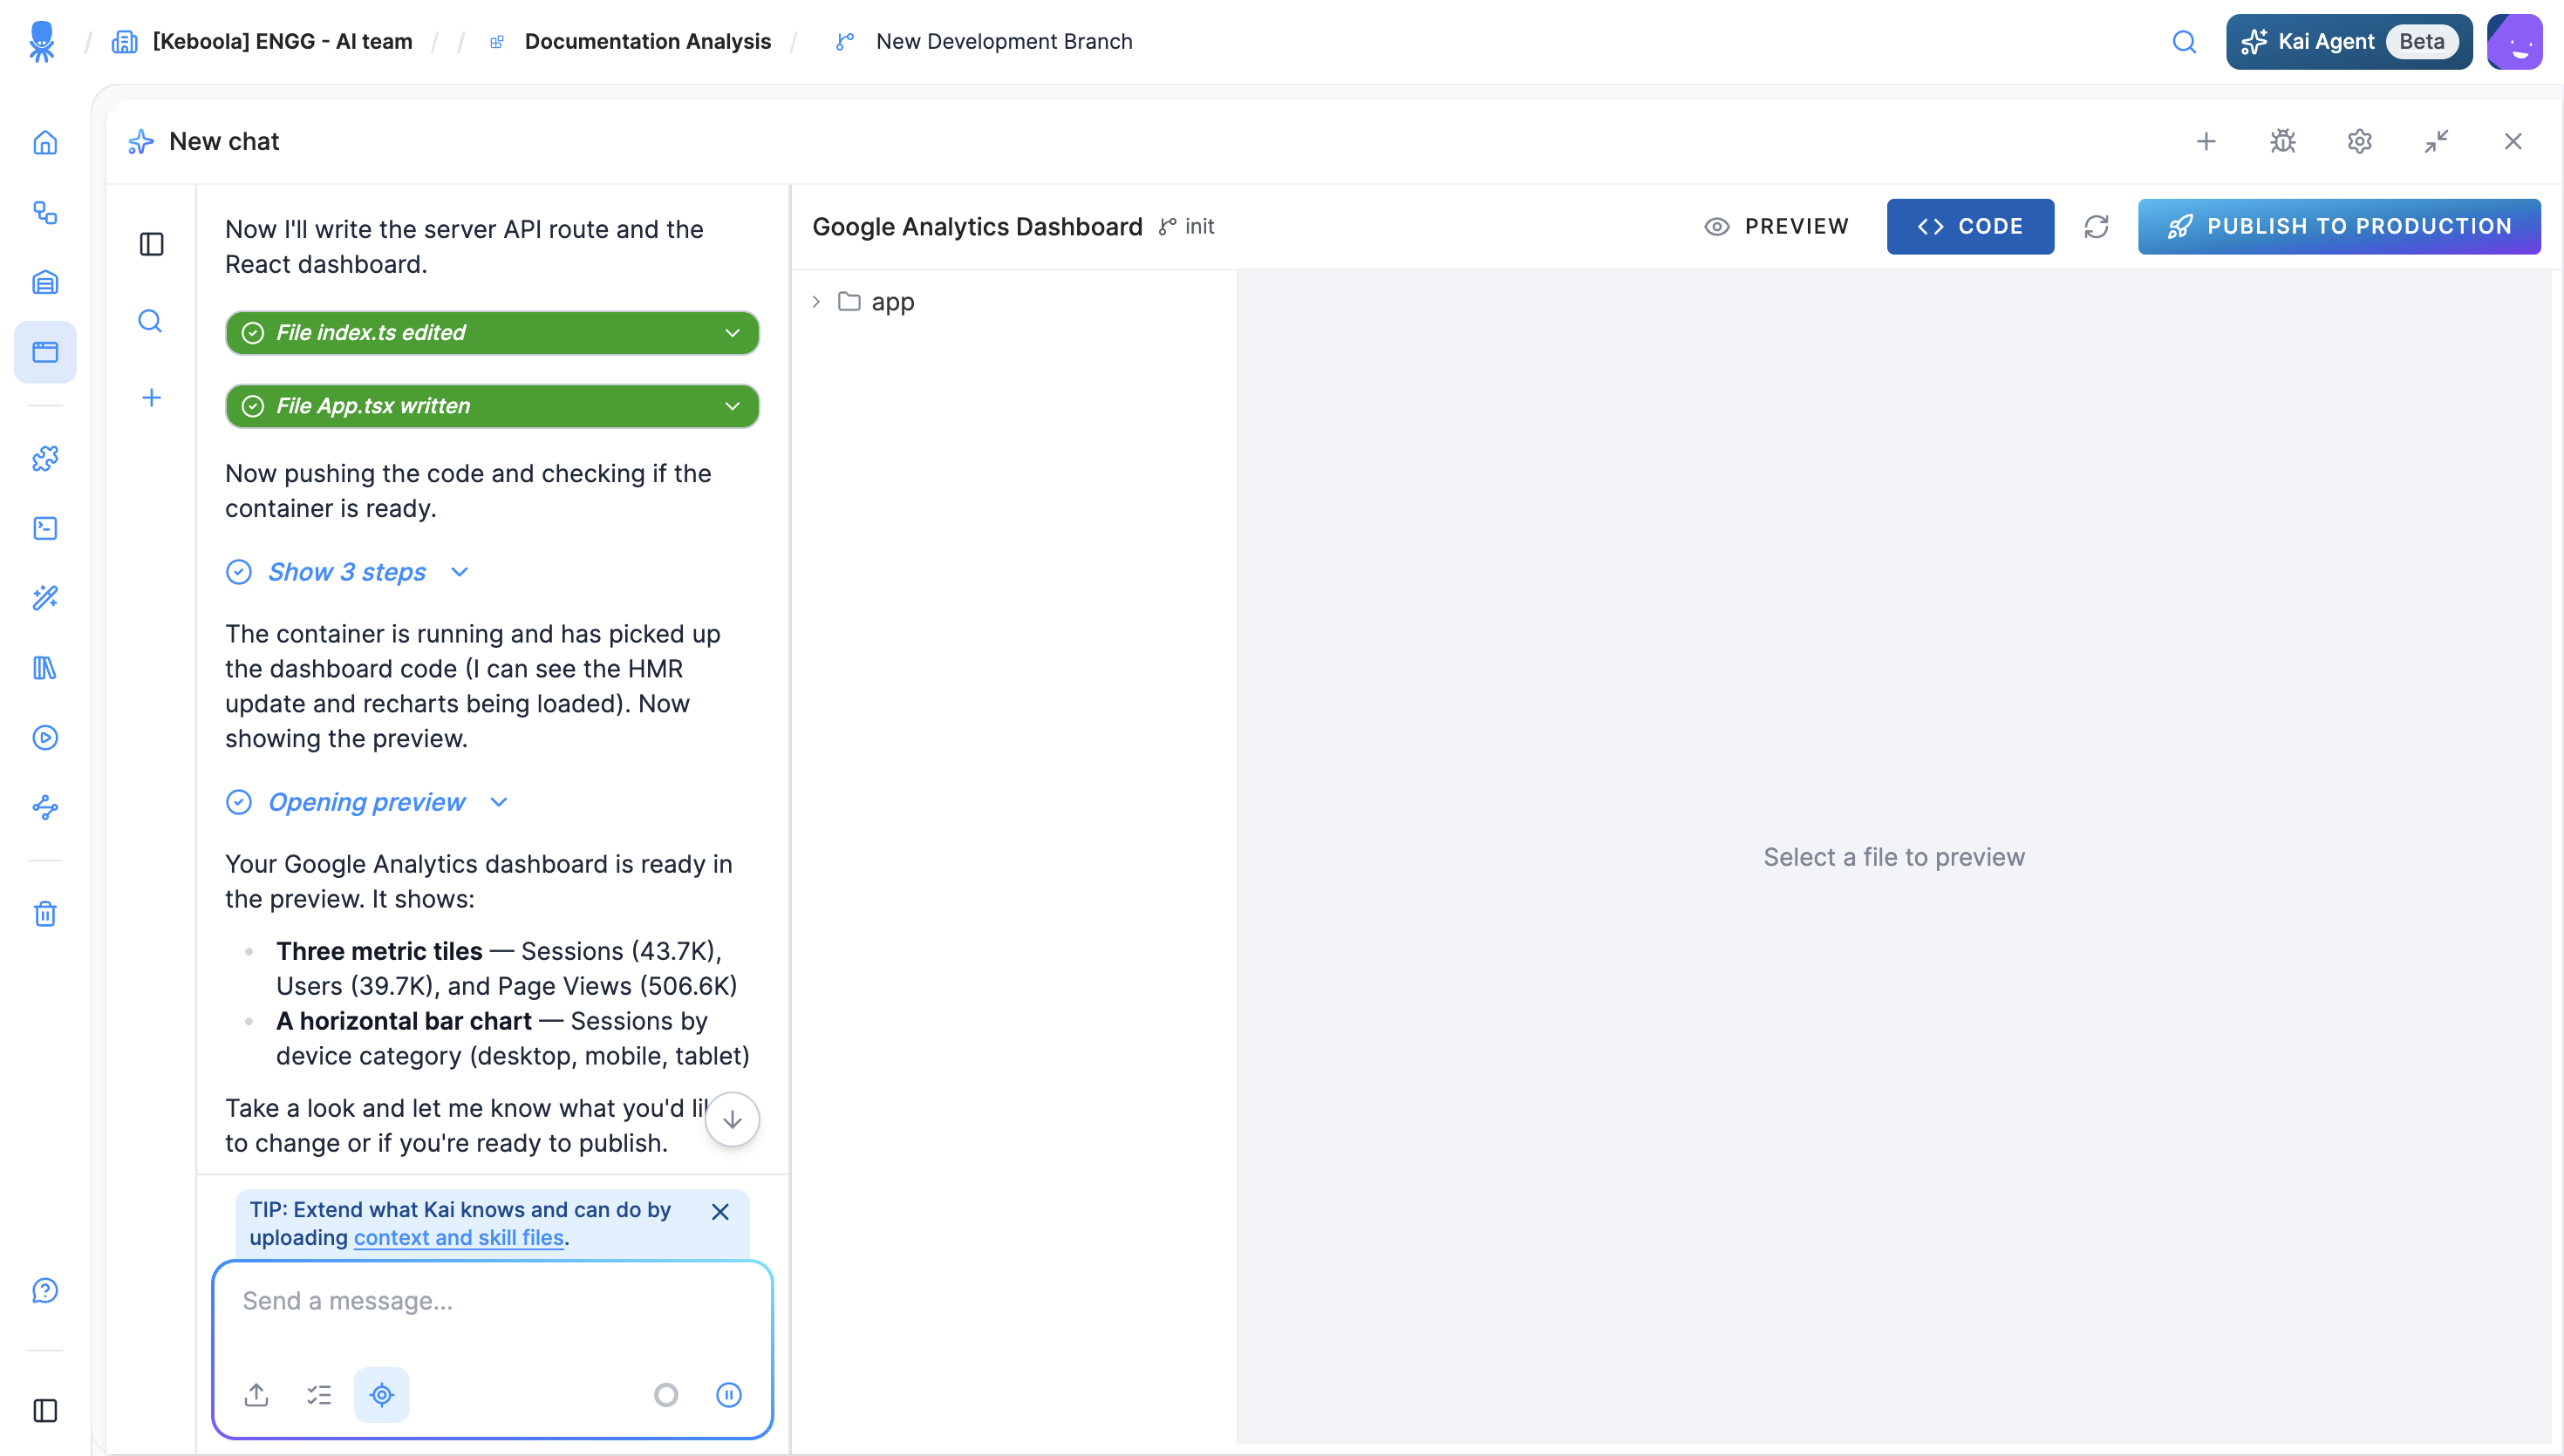
- Kai explores your Storage and writes the app. It lists buckets, reads table details, then writes the code — you see each step in the chat (File index.ts edited, File App.tsx written) while Kai pushes the code and starts a development container.
- A split-screen builder opens with your app as a draft: chat on the left; on the right the app’s name, a Preview of the running app, a Code view of its files, and a Publish to Production button. Kai finishes with next-step suggestions — publish, make changes, or ask for something else.
- Refine in chat, then publish. The draft hot-reloads as Kai edits. When you’re happy, click Publish to Production to make the app live and shareable.
Writing a good prompt
Section titled “Writing a good prompt”The clearer your first prompt, the closer Kai’s first version lands. Name three things: the data, the audience, and the main action you want people to take. For example:
Build a simple dashboard from my Storage data: a title, three key metrics as big number tiles, and one bar chart. Keep it clean and easy to read.
The more specific you are — which tables, which charts, who it’s for — the less you’ll need to refine afterward.
Refining your app
Section titled “Refining your app”Kai’s first version is a starting point, not the final word. Keep chatting to change it — ask for a different chart, another metric, a new filter, a cleaner layout — and Kai updates the app. Refine in as many rounds as you need before you share it.
What Kai does on its own — and what it asks first
Section titled “What Kai does on its own — and what it asks first”Kai explores your Storage without asking, so it can find the right tables and understand your data. Building a draft doesn’t touch your production project — the app goes live only when you click Publish to Production. For tools that do modify the project, Kai asks for approval unless you’ve pre-approved them with Always allow in Tool Permissions.
Create an app manually
Section titled “Create an app manually”Prefer to set the app up yourself, without the chat? Manual creation lives on the same Create App screen, under or create manually — pick a stack and Keboola sets the app up for you to configure.
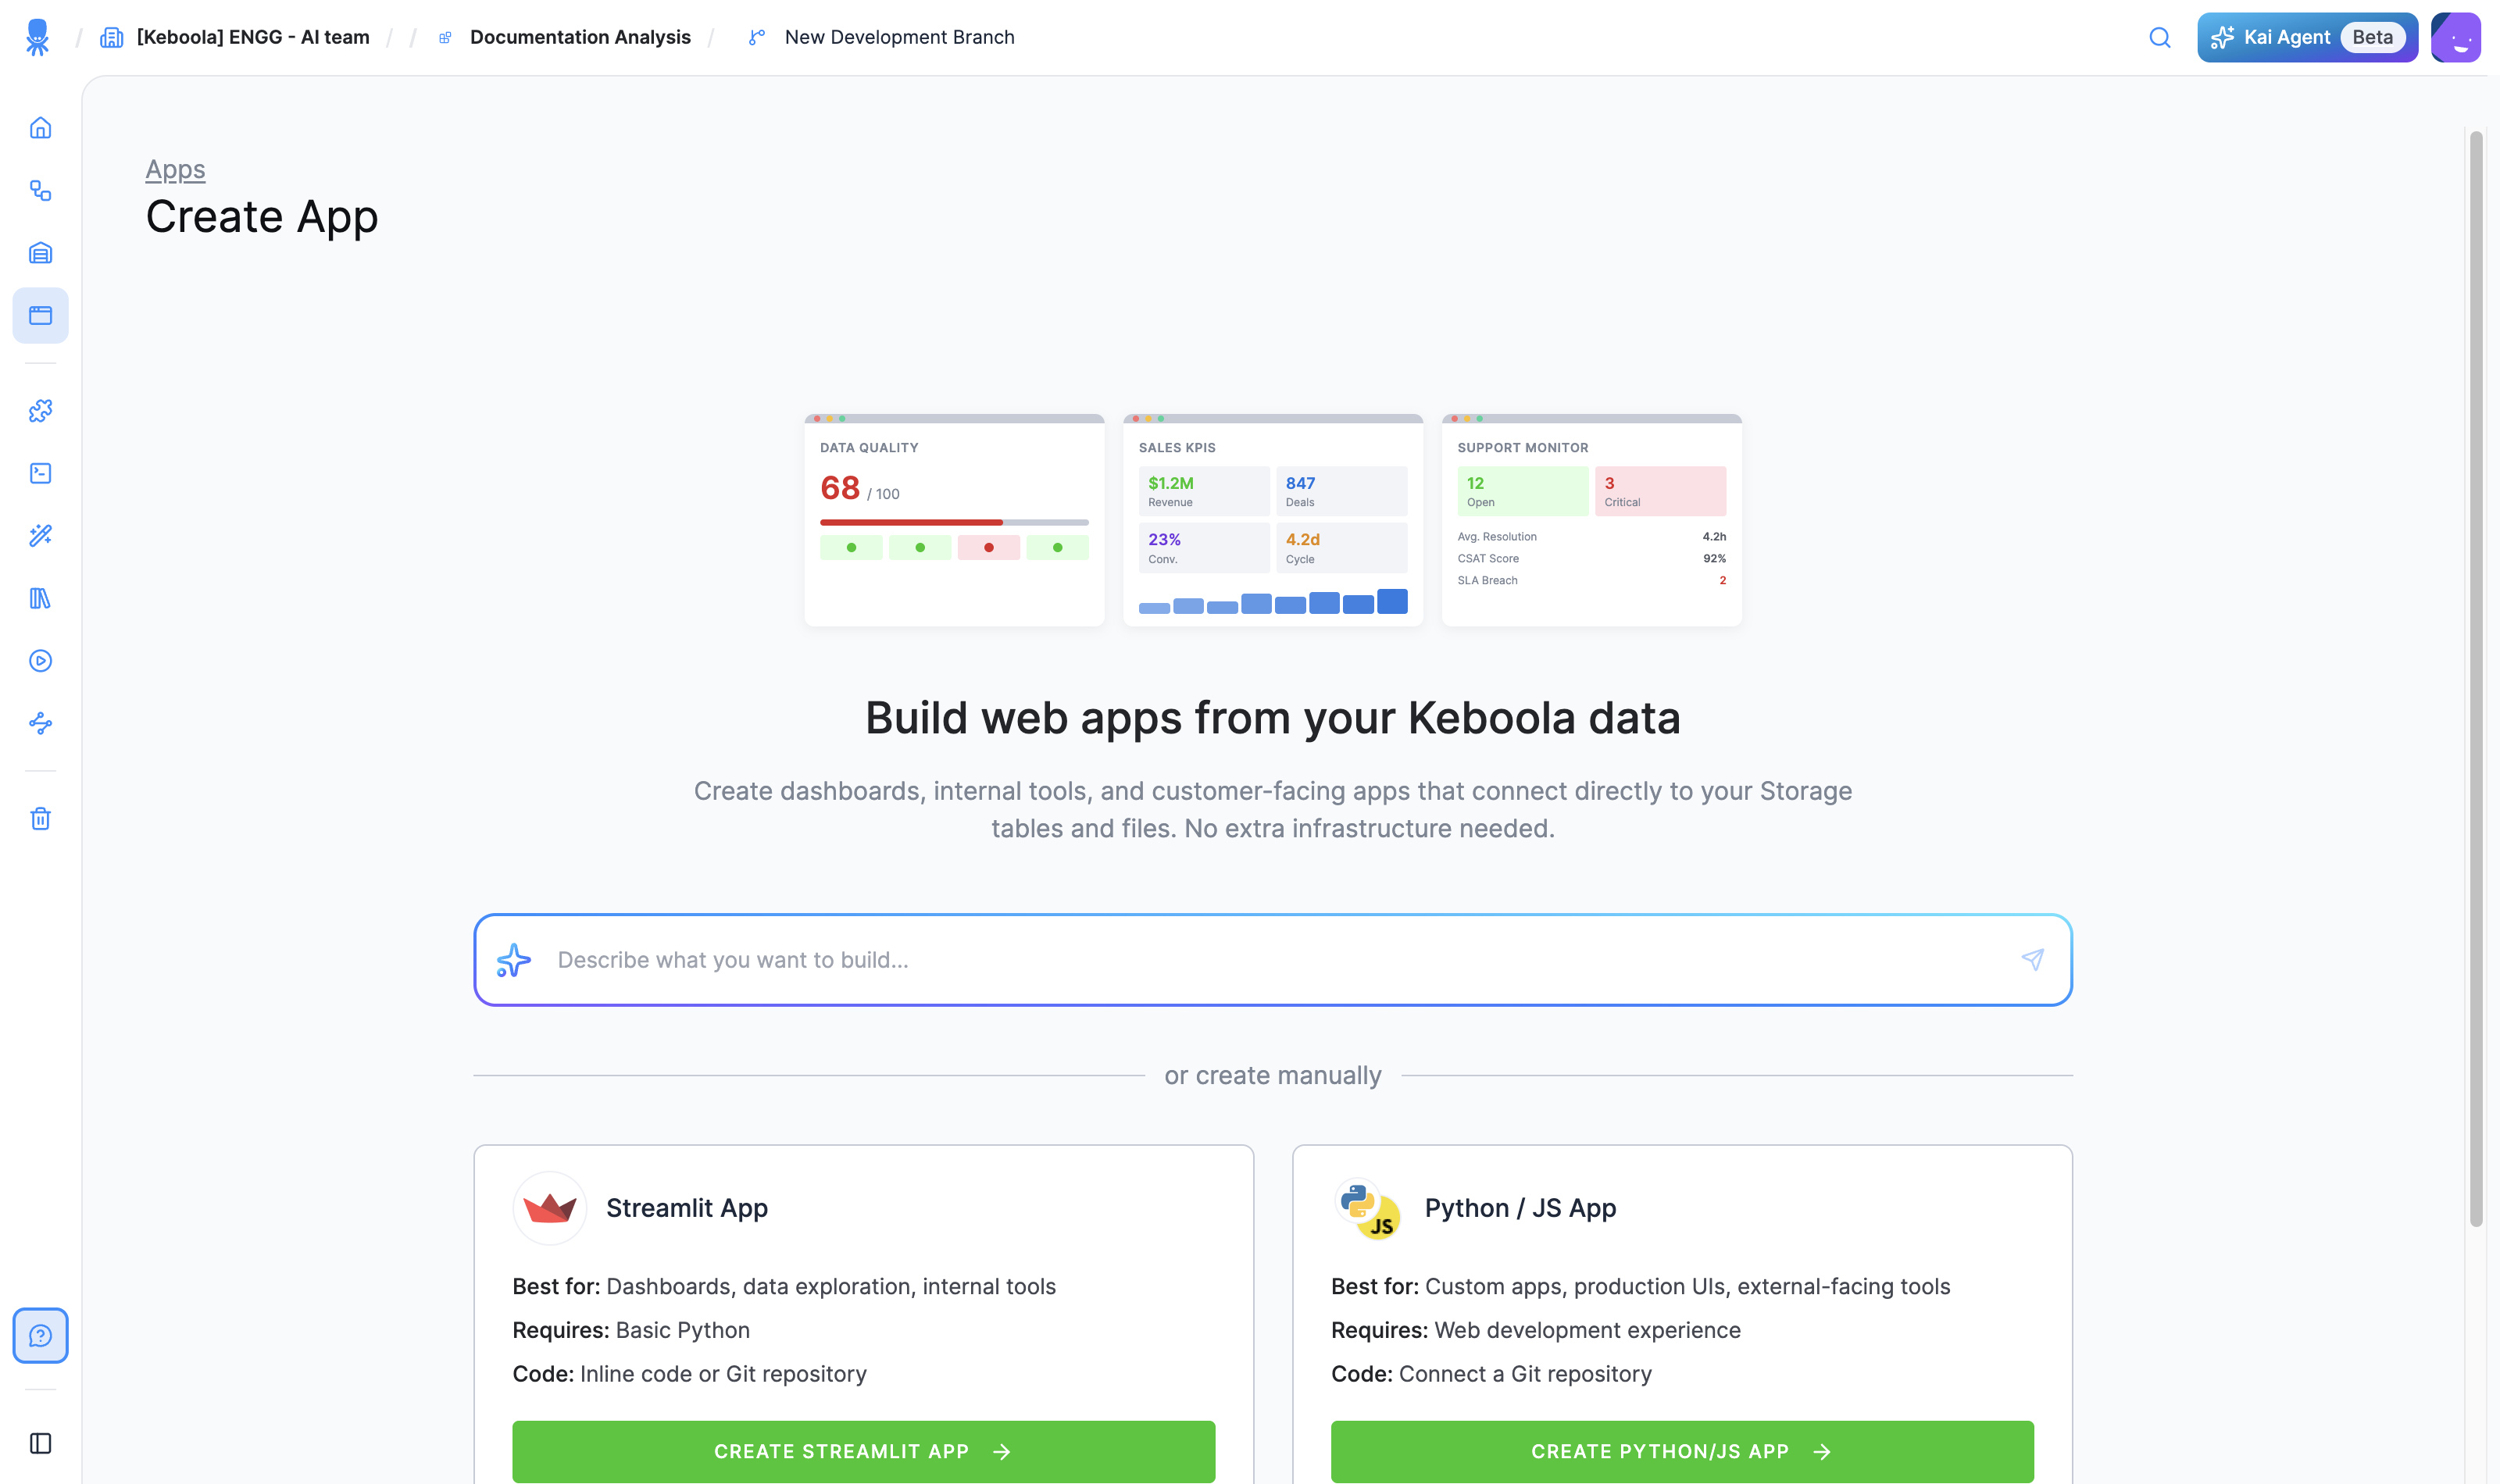
- In your Keboola project, open Apps and click + Create App.
- Under or create manually, choose a stack — Python / JS (custom apps, production UIs; connect a Git repository) or Streamlit (existing Streamlit apps; basic Python).
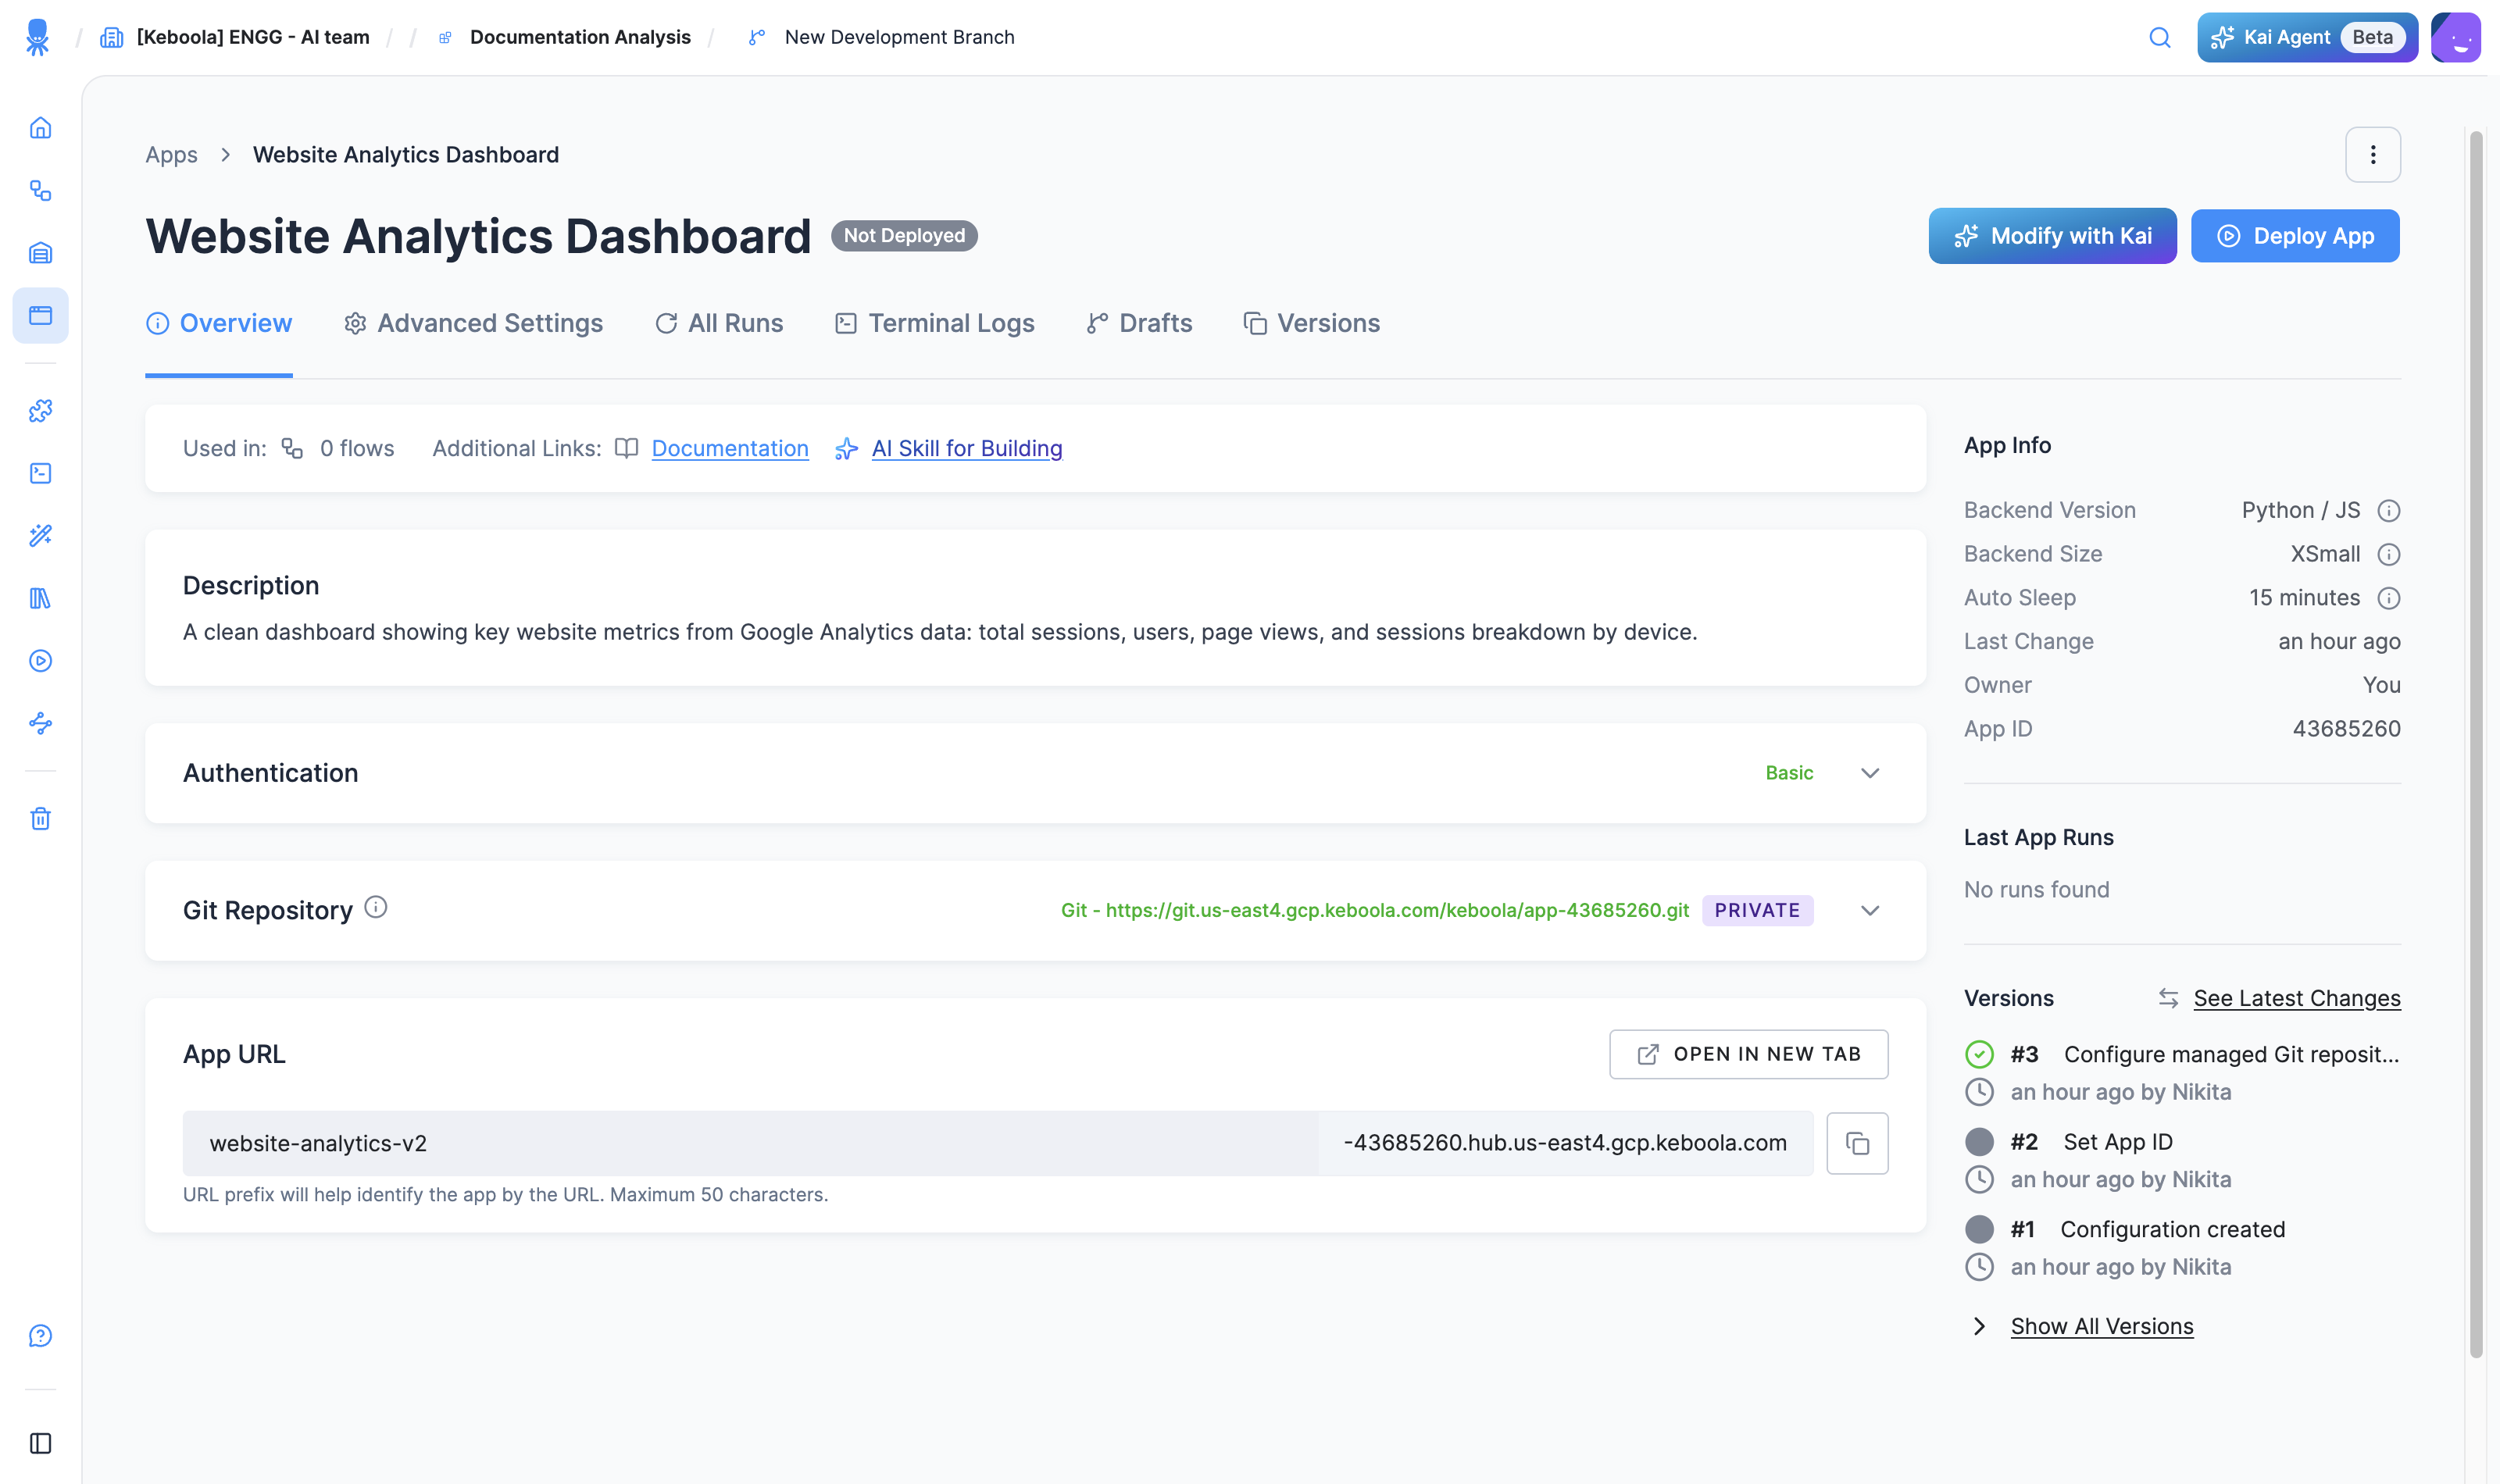
- Name the app and click Create App. It opens on its own configuration page, marked Not Deployed.
- Set the Code Source — paste inline Code or connect a Git Repository — and pick the Authentication method.
- Configure the rest of the app’s settings — backend size, auto-sleep, and more; see Reference for the full list.
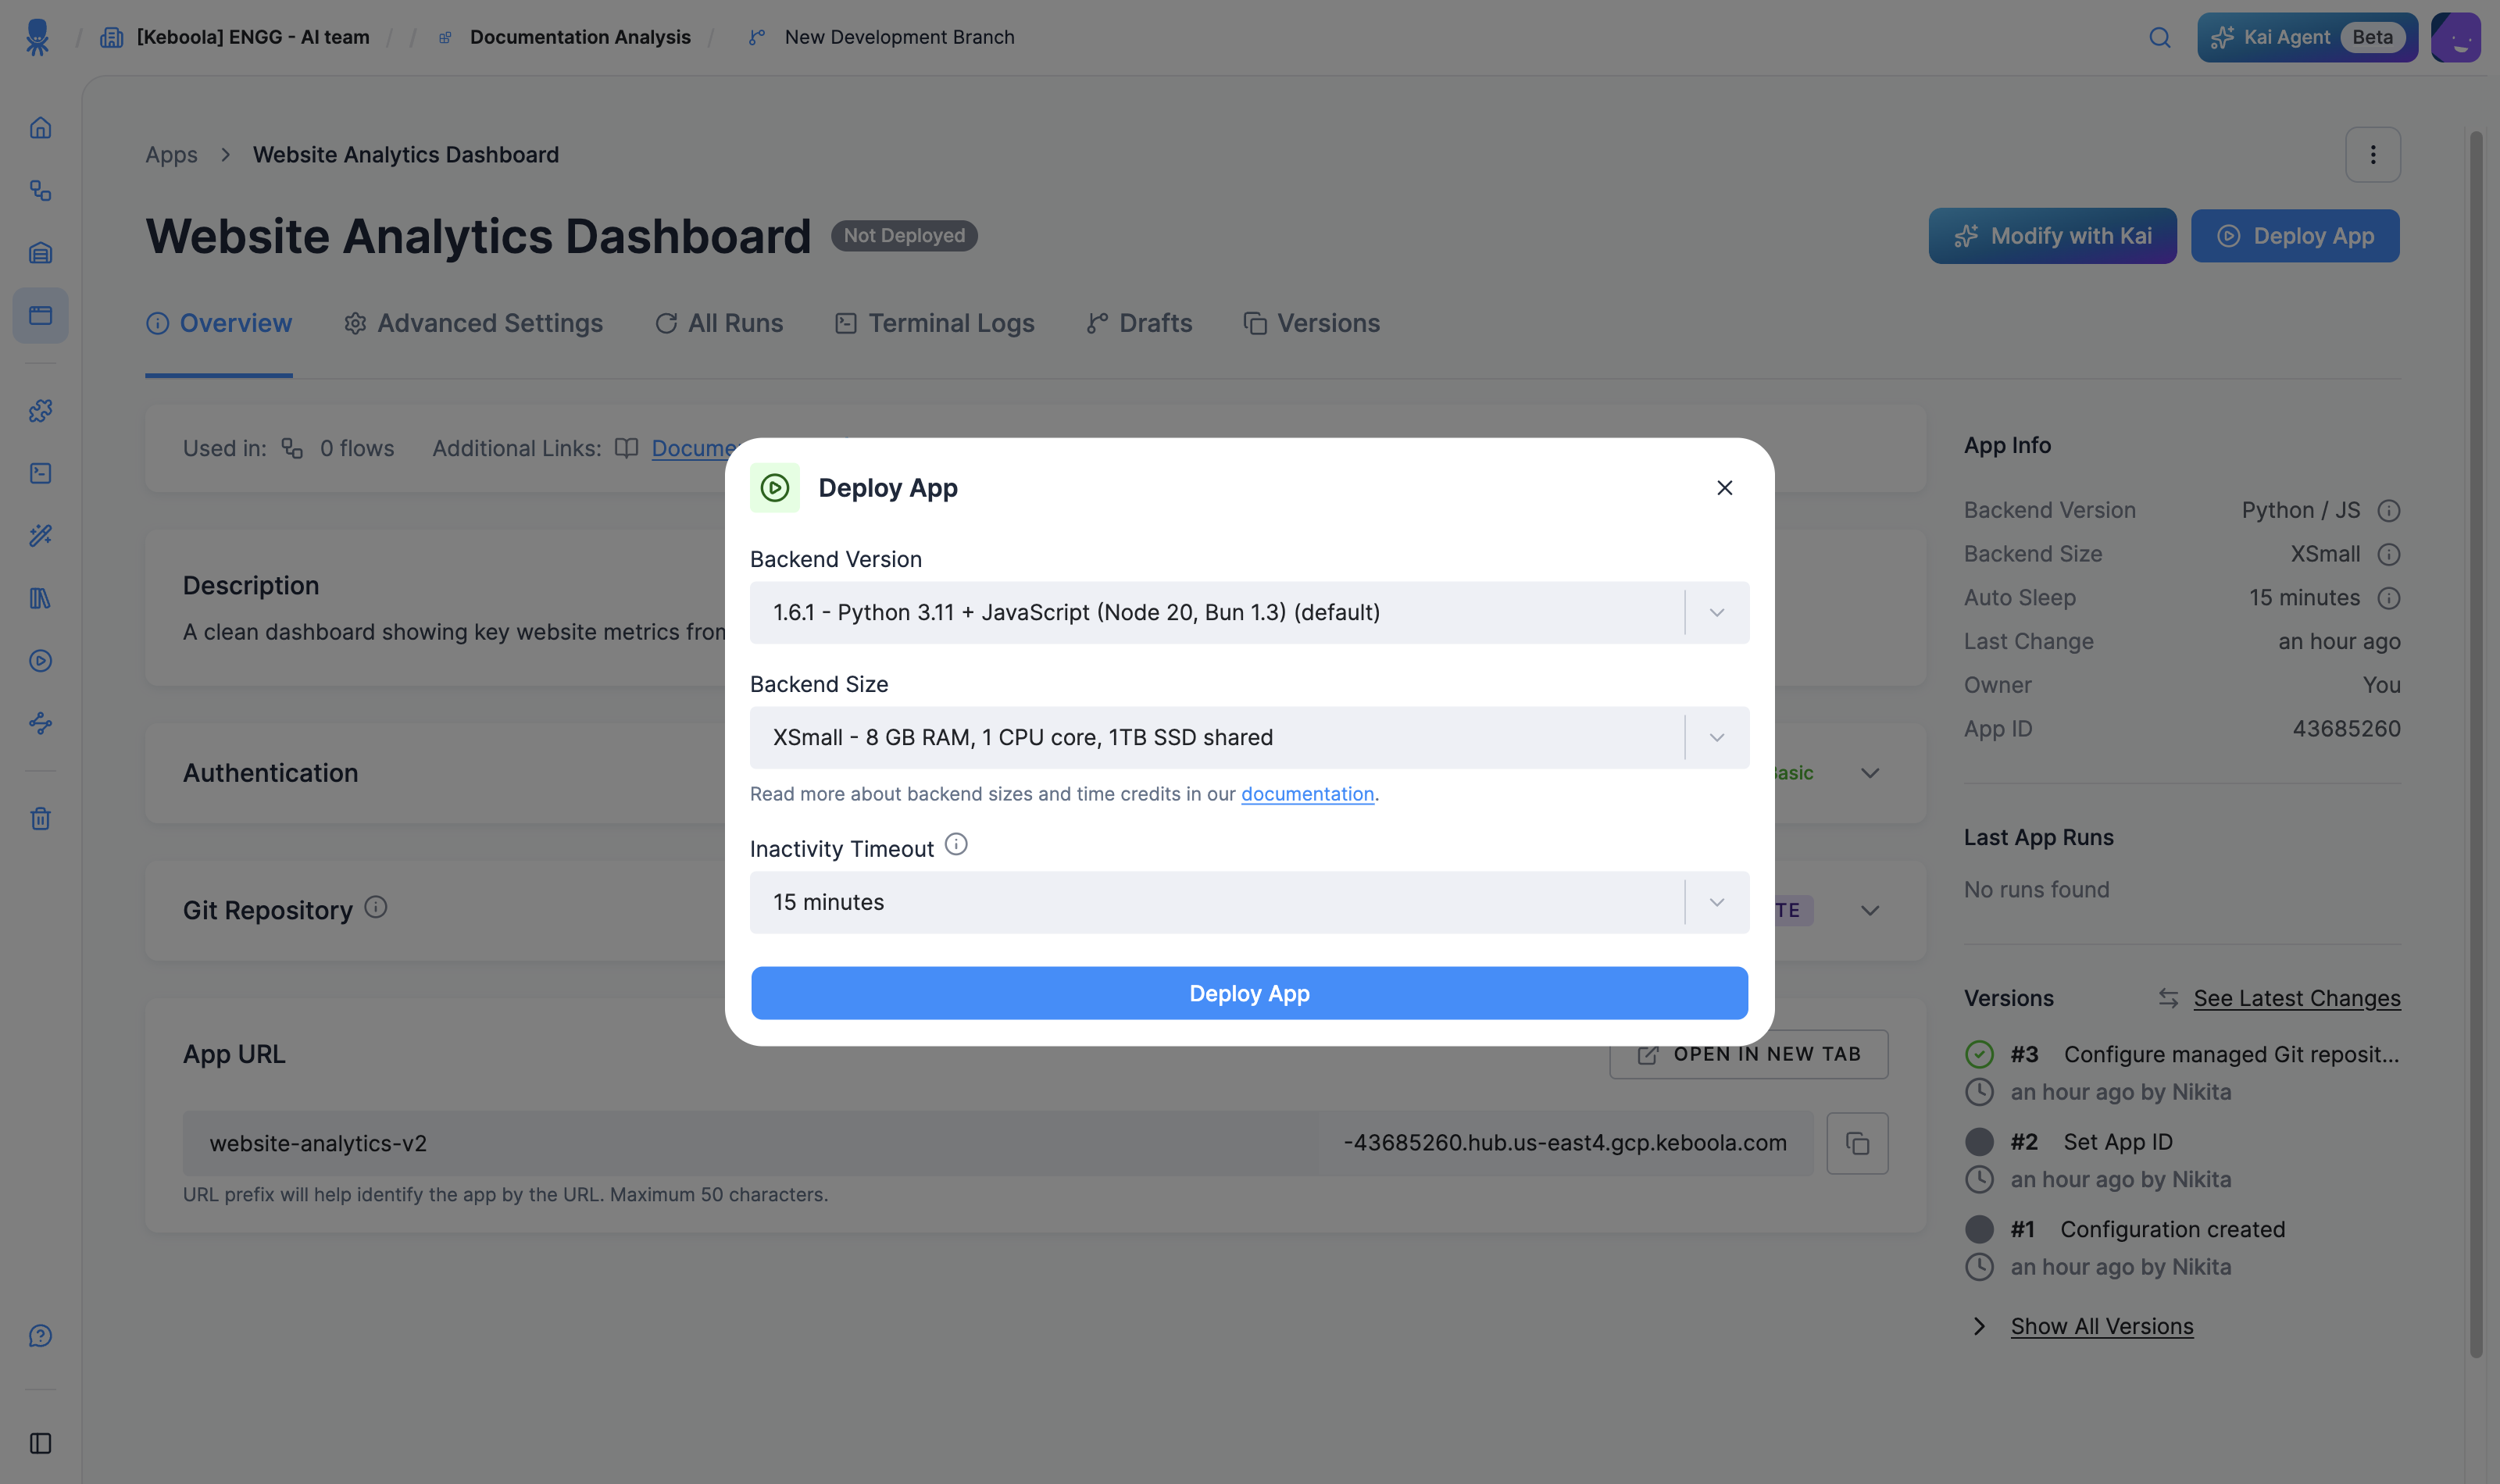
- Click Deploy App. A short wizard asks for the backend size and an inactivity timeout, then deploys the app. (The same wizard runs on Redeploy.)
- When the status turns Active, click Open App to open it at its public URL. Use Redeploy to apply any later config change; see App actions.
Move from draft to production
Section titled “Move from draft to production”A draft is your working version with live preview — it exists in the builder (and on the app’s Drafts tab) without affecting anything you’ve shared. When you’re happy with it, click Publish to Production: the app is deployed and available at its URL, behind the authentication you chose.
How Kai handles data access
Section titled “How Kai handles data access”Kai uses your data through the project’s access controls — the app can only reach data the project can reach. Read-only access is used by default, so the app can’t change your data unless you ask for write-back.
Expose the app to other agents
Section titled “Expose the app to other agents”An app you build with Kai can expose an API — or an MCP server — so another agent or service can call it, not just human visitors. The data-fetching logic stays server-side and your Storage token is never exposed to the browser. This is a Python/JS-app capability; for the scaffold and how to wire it up, see Build locally.
Next steps
Section titled “Next steps”- Authentication — control who can open the app.
- Publish and share — share it with your team.
- Beyond dashboards — see the range of what people build with Kai.
- Prefer to code it yourself? See Build locally.